Install Impax Toolbar Button
Watch the quick video below to see how to install the Pacsbin export button in Impax:
Here are step by step instructions to install the button.
- Open any study in Impax.
-
In the toolbar above the images, click the wrench button.
 (click to enlarge)
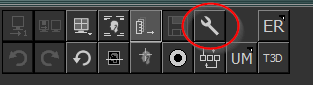
-
Find and click the Wizards tab.
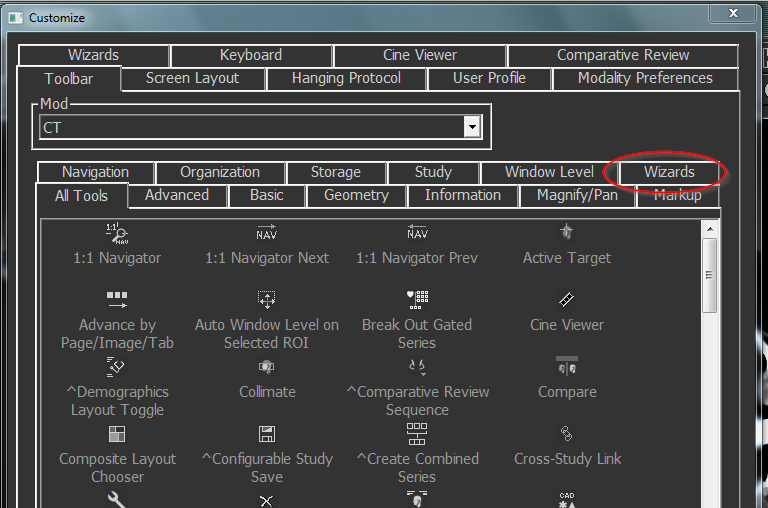 (click to enlarge)
 -
You should see your button in the list of options. To add it to your toolbar, click and drag the button
from the settings panel to your toolbar at the top of the screen.
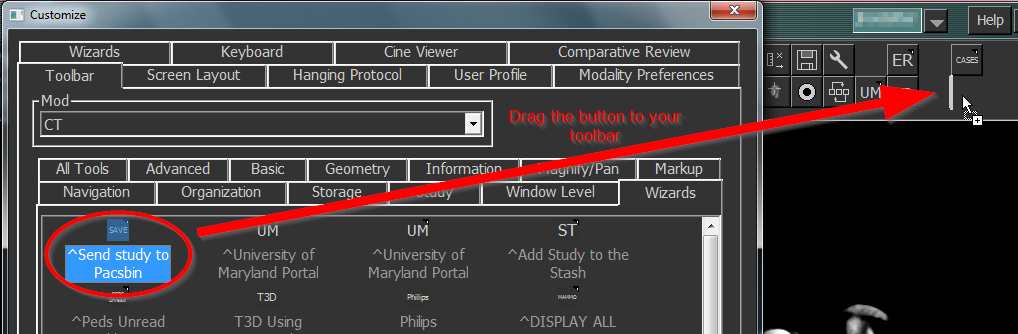 (click to enlarge)
 -
You must do this for each type of study (CT, MRI, CR), as each modality has its own toolbar. To do this,
select each modality from the dropdown menu above the list of buttons, then drag the button to the toolbar.
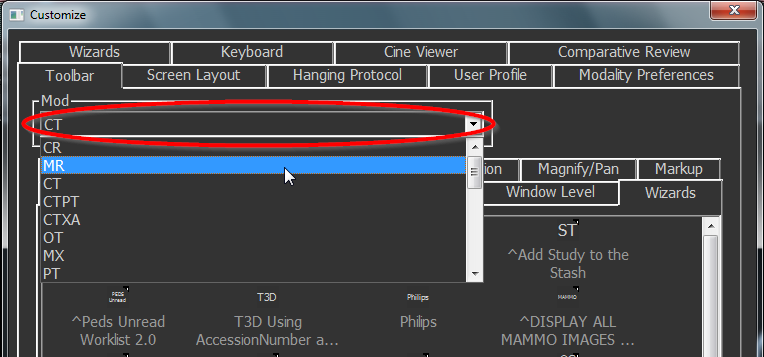 (click to enlarge)
 -
Click the Apply button, then the OK button.
 (click to enlarge)
 - Done!
If you have any questions or problems, please send a note here.